Saturday, 31 January 2009

More than just equipment


If you have the best equipment it does not mean that you will take the best photographs. You will still have to get up early to take photos during the 'golden hour'. This hour is the first hour of daylight when the sun is low in the sky and the light is softer and warmer. You can get the same effect in the last hour of sunlight, but the difference is you will have more people in your landscape photographs. I have described methods of touching up the photograph which would remove a person from the background of a photo, but it is much better if they are not there in the first place. There was nobody in this photo of 'The Platform' at Morecambe but it was taken during the golden hour in the evening.

You have to be ready for the photo at the right time and you also have to be at the right place. It is not just about being in Morecambe at the right time. I am not even talking about a helicopter ride or a holiday on safari, but for a good composition it might just be that you have to take two steps to the right to avoid a cluttered background. If you move slightly the background may become much more significant. There is one photo on my website where the church tower is behind the heads of the bride and groom. No other photographer would have that photo because they were not in the same place and kneeling.

Happy snapping
Friday, 30 January 2009

Emotion in photography

Emotion is so important in all types of photography. There are the photojournalists who capture the moment for the sake of a news item. The really famous photos in the news are the ones that have been the most emotional. Which do you remember? There is the photo taken by Nick Út during the Vietnam war, of the children running towards him but away from the napalm bombing. The second photo that comes to mind is the photo of the Hindenburg airship that was taken seconds after it burst into flames.

To take a really good portrait you want to see some emotion, unless you are taking a picture for a passport. It might be deep thought or happiness or nervousness. Yousuf Karsh was a Canadian photographer who took a very famous photograph of Winston Churchill. The story goes that he only had a couple of minutes to take the photo and Churchill was in no mood to have his photo taken. Karsh stepped forward and took Churchill's cigar from out of his mouth. Emotion is certainly visible in this photograph.

Emotion is everywhere even if it is the way the light falls on a landscape. Half the battle is to recognise the possibilities, the other half is to take them.

Happy snapping

Thursday, 29 January 2009

The clone tool


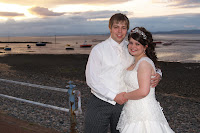
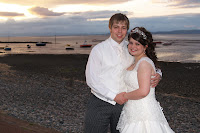
The clone tool is really useful when you are working on your digital photos. There are always alternative ways to do anything on the computer but when you first use the clone tool it looks amazing, and when you have used it for some time it still looks amazing. This is a lovely photo of the bride and groom but it looks even better by taking out the rail, and it is a simple technique when you know how to use the clone tool.

The clone tool does exactly what its name suggests. It copies one part of an image and transfers it to another part. The opportunities are endless. You can take out a lamppost if it is distracting. It is very easy to clone objects out of a sky unless there is a distinctive cloud shape, but these too are dealt with fairly easily. It is also very hard to see when an object has been taken out of a picture if there is a natural background like a hedge.

In a similar way, skin blemishes can also be taken out of a photo. That wonderful photo which wasn't quite perfect, now easily becomes perfect.

Happy snapping

Wednesday, 28 January 2009

Adding two photos together

I like to get brides and grooms to look into a mirror (or a picture it doesn't matter as you don't see the original). I superimpose a picture of the wedding day which makes it look like they are thinking about the way that the day will unfold. This example was taken just after the couple arrived at the reception and they are looking at a photo of their first dance. Very often I take the photos while the bride and groom are getting ready. So a mirror is often available.

The digital age is not just transforming the way we take pictures. It can also transform old family photos. Scan the picture into the computer and you have a digital version. Take out the creases, bring the colours back to life and improve the faded contrast. In fact anything that you can do with a digital photo can be done to an old picture.

If you don't have a scanner just take a picture of the picture. Be careful of the reflection from the flash, expecially if you have a gloss finish to the photo. The best answer for avoiding reflections is take the picture with natural light, but if you have no option then take the photo at an angle. This will obviously distort the picture but you can always correct the distortion digitally.


Happy snapping

Tuesday, 27 January 2009

What are megapixels?

What does it mean when you buy an 8 megapixels camera? The lens of a digital camera focuses the image onto electronic sensors. The sensor points are called pixels, and the more that you have, the better the quality of the picture. Have you noticed when poor quality pictures are enlarged the picture becomes 'pixelated'? You can see the individual blocks of the image formed by each pixel.

Mega means million, so if you buy an 8 megapixels camera it has 8 million electronic sensors. It sounds fantastic until you do some maths. To print a good quality image you need 300 pixels per inch. If you take a 10"x 8" photo it needs 300 x 8 pixels for the width, and 300 x 10 pixels for the length. The total number of pixels in this photo is (300 x 8) x (300 x 10) = 7,200,000 i.e. 7.2 megapixels. That marvellous 8 megapixel camera that you bought will only give you 10" x 8" prints!

This is not quite true. I have an 8 megapixels camera that give me very nice A1 sized photos. Why is there such a difference? Partly it is because you will get away with less than 300ppi, partly it depends on the quality of the camera, in particular the quality of the lens, and it also depends on the quality of your printing equipment.

The next time that you see one of those really large photos on a wall then have a look for the pixelation or if it is a film photo have a look for the grain.

Happy snapping

Monday, 26 January 2009

Perspective

If you are used to taking certain types of photo then see what happens if you change the perspective. I use the viewfinder because I have no option with my SLRs, but I also have a compact which is a fine camera and it gives me the option to look at a screen. I tend not to use this option partly because of habit and partly because I don't like reflections on the screen to spoil my view. However if you do use a screen then you are already taking the photo from a different perspective.

Have you seen the photographers on TV when they hold their camera at arm's length to try to get a photo through a car window or to try to take a photo above a crowd? They may be lucky, but they will also have a different perspective. Try close-ups or take the picture from a very low angle. Don't be afraid to take more foreground even if the interest is in the background. You can lead the eye to the main item of interest if there is a path that takes you there, or even a herd of cows!

Happy snapping

Sunday, 25 January 2009

Is photojournalism for you?

If you are a photojournalist should you help those in need? I hope the answer is yes, but what can you do if you are photographing a war or a famine. Should we expect BBC journalists to get involved? In today's papers the BBC is criticised for not broadcasting an appeal for a Gaza charity. The BBC say it would damage its impartiality but if people are in need shouldn't the BBC help?

You may have heard the song Kevin Carter by the Manic Street Preachers. He was a photojournalist who took a famous photo that won the Pulitzer prize of a starving toddler in the Sudan. He also took photos in 1994 of three white Afrikaaners who were shot and killed by the side of their car. A few months later he committed suicide. Now I am sure that there are lots of photojournalists who are fairly stable people who would not commit suicide, but there are lots of atrocities going on in the world. I am sure that we would all be moved much more if we were a few yards away for example, from horrific murders.

Happy snapping?

Saturday, 24 January 2009

Black and White or Sepia

These two photos were taken at the same time. I simply walked round the statue to get Morecambe Bay in the background. In the old days you had to decide whether you were going to take black and white pictures when you put the film in the camera. Going back in time a little further you only had black and white with the possibility of toning usually with sepia. Sepia helped the chemical stability of the print and these are the Victorian photos that have survived. Now you can change any picture to black and white or sepia and it is converted with the click of a button. If you have any experience of using computers then you will know that there are many ways of doing anything. You can also convert to black and white with a few clicks - it depends on your software and sometimes it is better to know the complicated alternative methods and sometimes the computer's automatic one click guess is as good as it gets.

So why have pictures in black and white or sepia or any other tone? The easiest and best answer is because you like that option. If you are distracted by the colour of the flowers and the significant object in the photo is the bride's face, then black and white or sepia may be the choice over colour. Very often a wedding photo is black and white with only the flowers in colour. This is fine as an alternative to just colour or just black and white but it comes back to personal choice.

In black and white the emphasis moves to the object shape. Tone and texture become much more important and for most people this is not the world as we see it. For these reasons black and white is seen as more 'arty' and if that is what you like then that is fine. You will always have the choice with digital photography. This sepia photo highlights the shape of the statue that overlooks Morecambe Bay. The colour photo highlights the grass, and there are plenty of weeds to catch the eye. You will also notice that I have cropped the grass as it is not that interesting, and finally be prepared to break the rules and take photos into the sun. You may catch a glorious sunset, the lighting of your main subject may improve, and you may avoid taking a picture of a waste bin in the background.

Happy snapping

Thursday, 22 January 2009

An interest in photography


Andreas Feininger was an American photographer and was famous for his photos of New York. He is quoted as saying "It's nothing but a matter of seeing, thinking, and interest. That's what makes a good photograph. And then rejecting anything that would be bad for the picture". Many of his quotes are related to interest and if you want to be good at anything, not just photography, you have to be interested.

Where do you find that interest? Feininger didn't tend to photograph people, his interest was the theory of photography, cityscapes and natural history. Who knows where interest comes from, but so much has changed with digital photography. If you see a photograph that you like then there is a very good chance that you can copy that style. Once you have followed the styles of others then you could think about your own style.

Happy snapping

Vignettes


A very simple technique in digital photography is to convert you pictures into black and white or sepia or any number of other colours. You have seen those old-fashioned sepia photos and now any of your photos can be like that at the click of a button.

A simple progression on this technique is to make a vignette. This is the effect around the photo that makes the edges fade into the paper. Here is a vignetter of Eric. Digitally this is a very easy technique. It means that you have to identify the part of the photo that you want to keep and the part that you want to lose, and you also have to choose how rapidly the fade will be. The term for this in digital photography is feathering.

Any technique is simple if you know how to do it, and you also have to learn what terms mean, but if you have the interest there is a lot of help out there to allow you to create vignettes. You can see a lot of examples of vignettes on my website at www.gradwellphotography.co.uk because it is a technique which I like to use for brides and grooms.

Happy snapping

Wednesday, 21 January 2009

Sharpening and blurring

Sharpening a photo is the opposite of blurring and both can be done on a computer. A sharpened photo looks like it has more detail, but too much sharpening make it look grainy. This is a term borrowed from conventional photography when you could see clumps of silver halide grains in the prints. However with digital photography if you can see the individual pixels it is called noise and if it is really obvious it is pixelation. You may have seen the occasional pixelation of your TV screen.

Sharpening is needed because digital cameras are not perfect and there will be a little blurring with each photo. However a badly out of focus photo cannot be rescued by the computer.

The opposite of sharpening is blurring. Soft focus photos are those which allow some blurring but there is still some sharpness about them. This blurring means that you don't see skin imperfections and is often used for portraits. However there are lots of other techniques that get rid of blemishes and don't cause blurring but I'll write about these at a later date.

I remember seeing a film which I think was from the 60s in which a photo was enlarged and enlarged again so that the date on a newspaper could be seen. This technique was possible with an expensive photographic studio and state of the art equipment. Now anyone can replicate this technique with a home computer. Just keep enlarging the photo but if you really want to see that date then sharpening may come in useful.

Happy snapping

Tuesday, 20 January 2009

Cropping


Cropping is probably the simplest thing that you can do to make a picture look so much better. Cropping helps the composition. It puts the main item of interest into the rule of thirds. This photo of a sunset over Morecambe Bay was fine but I wanted to see how it would look by cropping tightly around the sun, making it a little more red, and increasing the contrast.

Just like the rule of thirds, once you have learnt about cropping then learn to break the rules.

Happy snapping

Monday, 19 January 2009

Composition

There is so much to say about composition but I'll try to keep this blog relatively simple. If you have heard of the rule of thirds it is because it is a popular rule. Divide your picture into thirds horizontally and vertically and put an interesting subject where the lines cross. For example a sunset could go into any of the four places where these lines cross.

One of the most interesting things that I have heard is that we read from left to right and we look at pictures in the same way. So once you look at a picture, starting somewhere on the left, then allow interest to develop towards the right culminating in either of those two points where the lines cross on the right.

Some subjects are strong enough so that you don't follow this rule. One person filling the frame or a telephone box or any subject that is dominant enough will not follow this rule.

Take a look at pictures on your wall or in a book or on TV. Look for composition and once you have learnt the rule then look for how you can break it.

Happy snapping

Sunday, 18 January 2009

Introduction and sloping photos

Welcome to the first entry in this blog on photography. If you want to take photos it may be that you are naturally talented, but everyone can benefit from learning or being reminded of the many and varied aspects to photography. Experience helps but you can also learn little by little. There are no lesson plans, no tests, no homework, but by reading this blog you may learn something that will add to your knowledge of photography. This isn't a technical blog. there are plenty of books on the market that will tell you how to modify your photos. This blog is about what you should look for when taking a photo and how they could be amended.

The biggest change to photography in recent years has been the movement from film towards digital photography. This has dramatically changed the way photographers work and has meant that anyone can get excellent results. This has had a dramatic affect on cost. Once you have bought your computer and camera and software and got enough storage for your photos - OK it's expensive initially - you can take as many photos as you like. You only print the photos that you want after you have worked on them and got them just right. How many times have you taken a film to be developed, paid a few pounds and then found out that the photos were not what you expected?

If you have a horizon or a line of water in the photo like a pond or lake then make it horizontal. If you aren't sure that you can do this or you don't want to spend time with a tripod then you can change the angle when you crop the photo. I know of one professional photographer who uses a photo on his website in which Lake Windermere is sloping!

Happy snapping.